NEWS & EVENT
The first time, the latest developments
The first time, the latest developments
Corrugated panels are translucent laminates consisting of a uniform mat of high strength glass fibers imbedded in organic resin. The resin matrix cures under heat to a solid material which is lightweight, strong, and shatter-resistant; with excellent light diffusion characteristics. Colors are compounded into the resin before cure, thus making the colors as integral part of the composite material.
(1) Building a Patio Cover
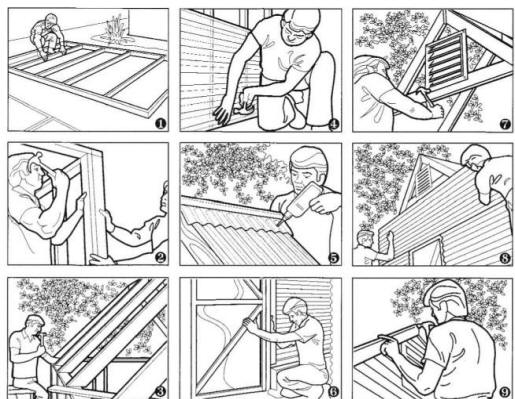
No special tools or skills are needed. Just keep in mind common dimension lumber and standard size panels when laying out your design.
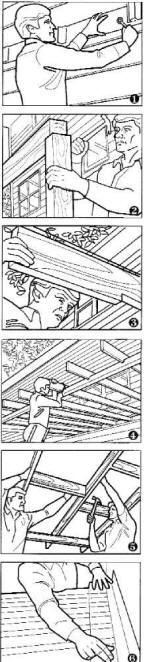 |
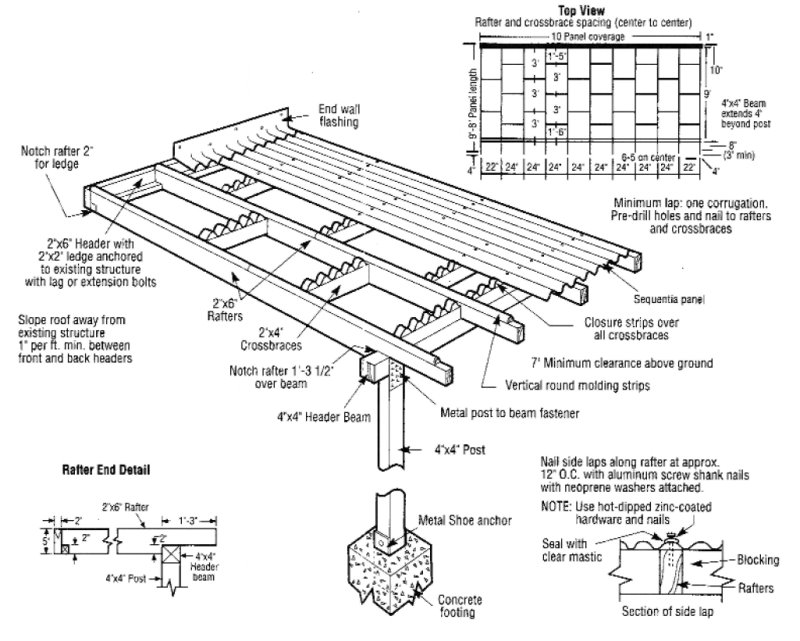
(1) Post foots should be approximately 14" deep and 12" across. Set 8" x 3/8" bolt about 3" deep into poured concrete for post anchors. Wood posts may also be secured with 4" angle brackets. Attach 2" x 6" rafter hangers to header, then attach header to house studs with lag screws. |
| (2) Drill posts and set on pins. Toenail crossbeam to post. NOTE: allow 7' 4" from floor to bottom of front header for best ventilation. | |
| (3) Pre-notch rafters to compensate for
slope. Allow a 1" minimum pitch per foot for adequate drainage. |
|
| (4) Attach rafters to header and crossbeam with 1" screws and nails. | |
| (5) For ease of installation and an attractive design, nail crossbraces between rafters using alternate spacing. Nail round and corrugated molding strips to framing, then paint or stain wood before installing panels. | |
| (6) Lay panels on rafters with one corrugation overlap and fasten with aluminum screw nails. Holes should be predrilled. Attach flashing at same time. |
|
Patio Cover Materials List |
|||
| Corrugated Panels |
4-26" x 10' |
5-26" x 10' |
6-26" x 10' |
| Wood Filler Strips |
5 strips |
6 strips |
6 strips |
| Flashing |
4 flashing |
5 flashing |
6 flashing |
| Nails |
2 boxes |
2 boxes |
3 boxes |
| Caulk |
4 tubes |
5 tubes |
5 tubes |